Documents Module: Uploading a Document
One or more documents can be uploaded at a time to eCare Vault. Follow the steps below to securely store your documents.
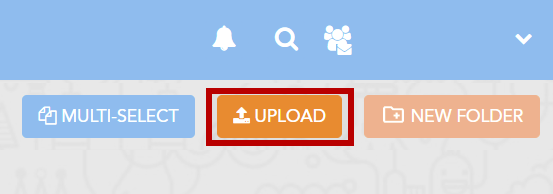
Step 1 - Navigate to the folder you would like to upload your files to. Once you're there, click the 'UPLOAD' button at the top right of the Documents module.
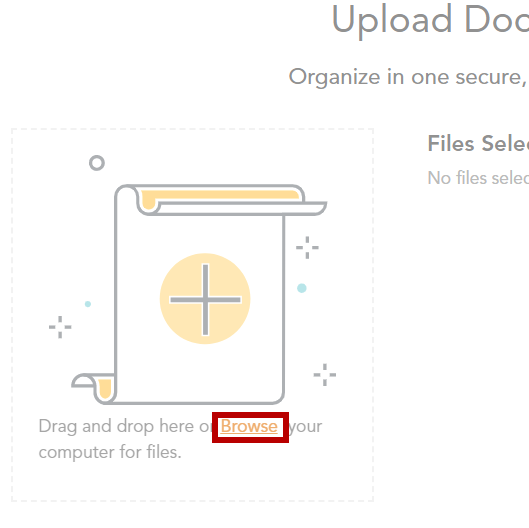
Step 2 - The Upload Documents menu will now appear. Files may be dragged and dropped to the indicated section.
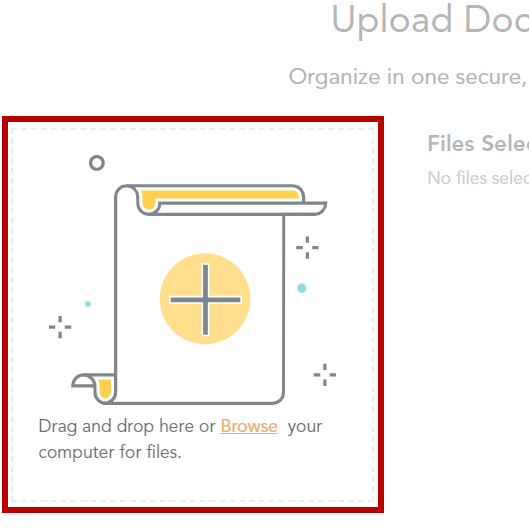
You may also select the 'Browse' text to search your system for files to upload. Select one more files to upload.
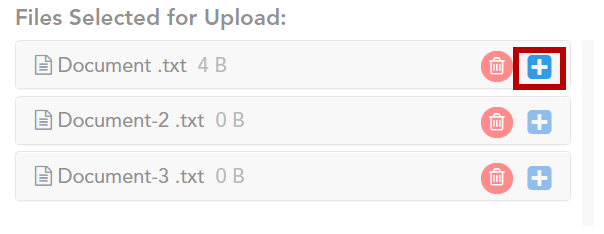
Step 3 - As each file is added to the Upload Menu, you may perform additional actions to edit the files before uploading them to eCare Vault.
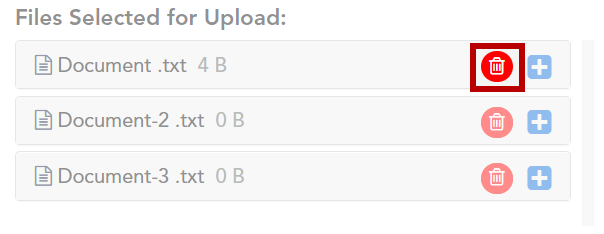
If you've selected multiple files to upload, they will appear in a list. Selecting the 'plus' icon will display more information about the file to edit.
The document's title can be changed by typing into the 'Document Title' text box.
A list of Document Types are available to be selected from a dropdown menu. Author Types can be similarly selected.
A description of the file can also be added.
If you would like to remove an item from the list of files to be uploaded, click the red 'trash can' icon.
Step 4 - Once the files are ready, click ‘UPLOAD'. The following menu will appear which will allow you to specify sharing permissions for the document.
If the document is being uploaded to a team’s folder, all members of the organization on the team will have permission to view and download the document.
Clicking ‘CONTINUE’ will upload the files to eCare Vault.